:: TUTORIAL [2] ::
|Melindungi Gambar|Metode Grid|
|VERSI INDONESIA|
Tutorial, eh.. tips kali ini singkat saja. Pada saat
awal-awal menggambar dengan pensil dulu aku sering merusak hasil karya aku sendiri bahkan sebelum karya itu selesai. Semuanya karena tangan saya sendiri
yang menggesek arsiran pensil di atas kertas.
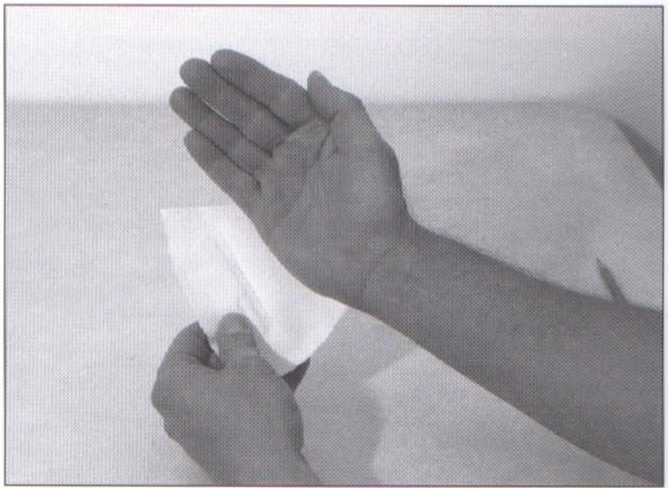
Untuk menghindari hal tersebut, cukup gunakan tisu atau kertas buram untuk dijadikan alas tangan anda yang memegang pensil. Kertas tersebut bisa berukuran kecil seukuran kepalan tangan atau selebar kertas gambar anda. Tips lain, mulailah menggambar dari sisi kiri kertas gambar, sehingga tangan anda tidak menyentuh bagian gambar yang telah tergores di atas kertas.
Untuk menghindari hal tersebut, cukup gunakan tisu atau kertas buram untuk dijadikan alas tangan anda yang memegang pensil. Kertas tersebut bisa berukuran kecil seukuran kepalan tangan atau selebar kertas gambar anda. Tips lain, mulailah menggambar dari sisi kiri kertas gambar, sehingga tangan anda tidak menyentuh bagian gambar yang telah tergores di atas kertas.
|ENGLISH VERSION|
Tutorial is now faster.. At the time of the early drawing with pencil I used to undermine the work of myself even before the work was finished. All because of my own hand that swipe shaded pencil on paper.
To avoid this, use a tissue or paper sufficiently opaque to be used as the base of your hand holding the pencil. The paper can be small fist-sized or wide as your drawing paper. Another tip, start drawing from the left side of the drawing paper, so that your hands do not touch the image that has been etched on paper.
|Melindungi Gambar|

Gunakan alas kertas
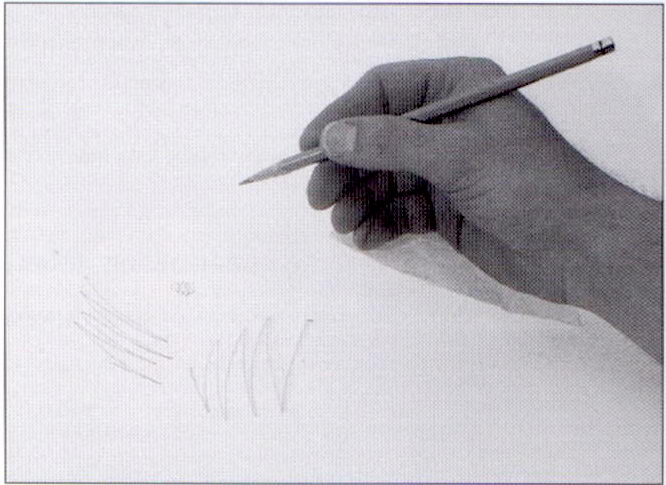
Kertas gambar akan terlindung dari gesekan tangan
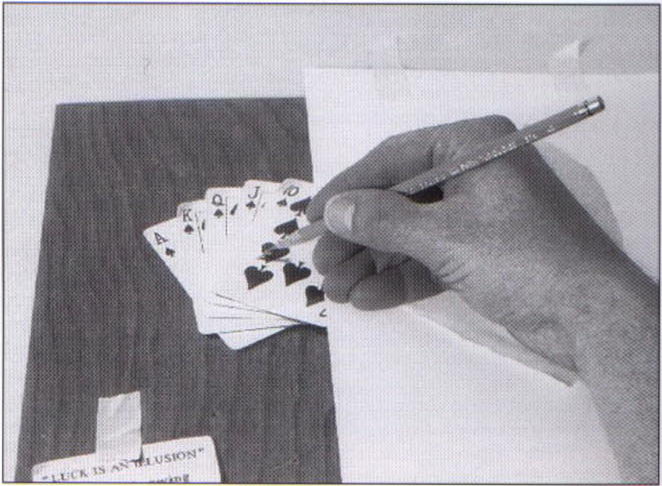
Mulai menggambar dari sisi kiri kertas gambar
|Metode Grid|

|VERSI INDONESIA|
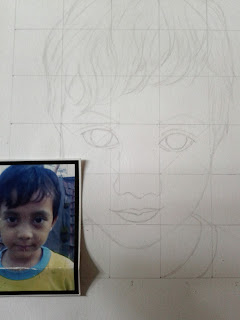
Gambar di atas aku ambil dari buku How to Draw Lifelike Portraits From Photograph karya Lee Hammond. Metode grid yang akan saya jelaskan adalah tahap 1 dan tahap 2 dalam gambar di atas.
|ENGLISH VERSION|
The above picture I took from the book How to Draw Lifelike Portraits From Photograph work of Lee Hammond. Grid method that I will explain is the stage 1 and stage 2 in the picture above.


|VERSI INDONESIA|
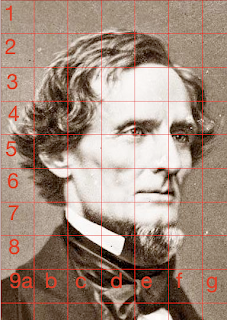
Di antara teman-teman ada yang ingat dulu waktu masih duduk di bangku SD atau SMP pernah membuat peta di atas kertas kalkir dalam pelajaran geografi? Agar bentuk pulau yang dibuat akurat perlu dibuat kotak-kotak atau garis bantu baik di peta yang dijadikan referensi ataupun di atas kertas kalkir tersebut. Prinsip metode ini sama seperti cara membuat peta tersebut.
Mungkin ada yang berpendapat “Ah, kalo kayak gitu aku juga
bisa” atau “Ini cara curang dalam menggambar”. Ketahuilah teman-teman, metode
ini hanyalah alat bantu. Sama seperti kita menggunakan penggaris untuk membuat
garis lurus, atau menggunakan pen tools dalam Adobe Photoshop. Tidak ada yang salah
dengan menggunakan metode ini. Bahkan Leonardo Da Vinci pun menggunakan metode
grid dalam membuat karya seni atau penelitiannya.
Kita mulai saja ya…
Pertama, tentukan foto referensi yang akan digambar. Dalam
membuat lukisan foto saya selalu menyeleksi foto referensi. Untuk satu objek
gambar, minimal aku memerlukan 3 foto untuk saya pilih salah satu. aku pilih
foto yang resolusinya besar, gambarnya jelas (tidak blur), dan memiliki kontras
yang tinggi (perbedaan gelap terangnya jelas).
|ENGLISH VERSION|
does anyone remember once when I was in elementary school or junior high once made on tracing paper maps in geography lesson? In order to form the island made an accurate need to be made boxes or both help lines on the map that is used as a reference or above the tracing paper. The principle of the method is the same as how to create the map.
Maybe there who think "Ah, if I could be like that" or "It's a way of cheating in drawing". Know friends, this method is just a tool. Just as we use a ruler to make a straight line, or use the pen tools in Adobe Photoshop. There is nothing wrong with using this method. Even Leonardo Da Vinci was using the grid method in making art or research.
We begin, yes ...
First, determine the reference photographs that will be drawn. In making my photo painting always selects the reference picture. For one object image, I need a minimum of 3 photos for my select one. I select the image resolution is great, the picture is clear (no blur), and has a high contrast (difference in brightness clear dark).


TERIMA KASIH SUDAH MEMBACA MOHON KRITIK DAN SARAN
THANK YOU'VE READ PLEASE FEEDBACK AND SUGGESTIONS
No comments:
Post a Comment